Discard (TRIM) with KVM Virtual Machines
Update - March 09 2020
Since writing this article, I’ve made a few observations:
- More people read this than expected
- QEMU has since added discard support to the standard virtio disk, avoiding the need to use virtio-scsi
- It kinda sorta works out of the box.
I’ve written a brief followup: Discard (TRIM) with KVM Virtual Machines… in 2020!
Original Article
I’ve got a bunch of KVM virtual machines running at home. They all use sparse qcow2 files as storage, which is nice and space efficient – at least at the beginning.
Over time, as updates are installed, temp files are written and deleted, and data moves around, the qcow2 files slowly expand. We’re not talking about a massive amount of storage, but it would be nice to re-sparsify those images.
In the past, I’ve made a big empty file with dd and /dev/zero, delete it, then fallocate on the host to punch the detected holes. However, this is cumbersome.
As it turns out, there is a better way: discard. Discard support was initially added to tell SSDs what data can be cleaned and re-used (SSDs call it ‘TRIM’), to preserve performance and extend drive lifetime (allowing better wear levelling). The same methods can also be used to allow a VM to tell it’s host what part of it’s storage is no longer required. This allows the host to actually regain free space when guest machines do.
I used the following two pages as references. The first is more generically useful for machines with actual SSDs, as well as checking trim works through multiple storage layers (dm, lvm, etc).
Fix fstab
Ensure you’re not using any device paths in fstab, like /dev/sda1 or /dev/vda1. These steps may renumber or rename your hard disks, and you don’t want to troubleshoot boot problems later on. Switch them to LABEL or UUID entries, depending on your preference/use-case.
This also means fixing your initrd and grub, if necessary. Most installs shouldn’t require that, though. Typically, it’s just lazy manually-added filesystems :)
It goes without saying, but reboot your VMs now to ensure they boot after your changes. That will make troubleshooting easier later.
Shutdown VMs and libvirtd
Since I’m doing some manual munging of the VM definition files, first step is to shut down all VMs and stop libvirtd.
Update machine type
Some of my VMs were quite old, and were using old machine versions, as evidenced by one of the .xml files in /etc/libvirt/qemu:
<type arch='x86_64' machine='pc-i440fx-1.6'>hvm</type>
From what I understand, machine types later than 2.1 include discard support. I wanted to update everything to the current 2.3 machine type:
sed -e "s/pc-i440fx-.../pc-i440fx-2.3/" -i *.xml
Add discard support to hard disks
Your sed line will vary here. I’ve manually specified writeback caching, so my hard drive driver line looks like the following:
<driver name='qemu' type='qcow2' cache='writeback'/>
It was fairly simple to add discard:
sed -e "s#writeback'/>#writeback' discard='unmap'/>#" -i *.xml
It should now look like this:
<driver name='qemu' type='qcow2' cache='writeback' discard='unmap'/>
You could probably key off the qcow2 bit instead of the writeback bit. The order doesn’t matter.
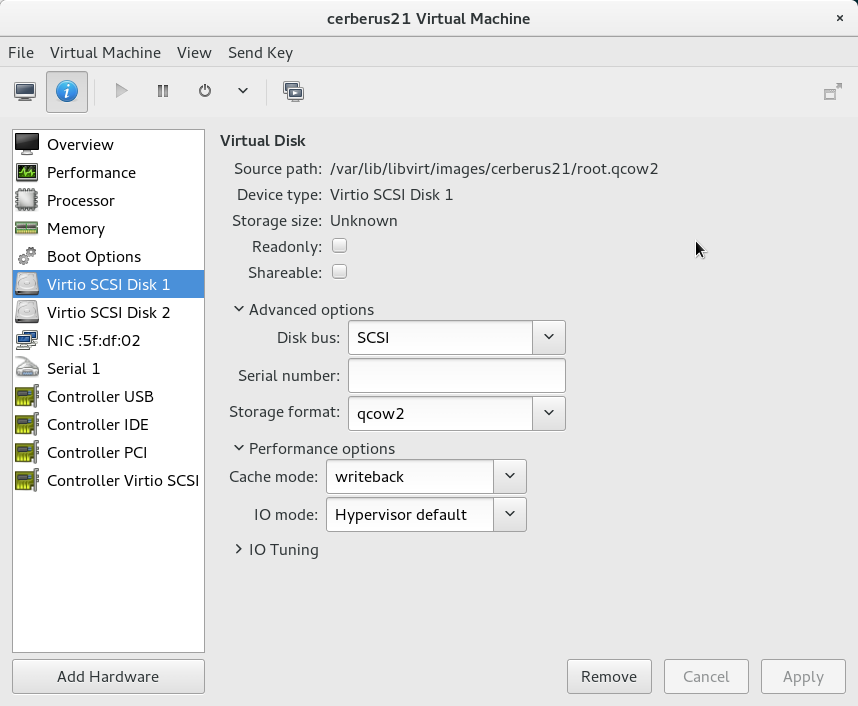
Change each hard drive from virtio to scsi bus
All of my VMs were using virtio disks. However, they don’t pass discard through. However, the virtio-scsi controller does.
There is probably a pretty easy way to do this with virsh, but I opted to just use virt-manager, since I have a finite number of VMs (and reading the man page for virsh would take longer than just doing it with virt-manager).
Change Disk Bus to SCSI:
Change SCSI Controller to VirtIO SCSI:
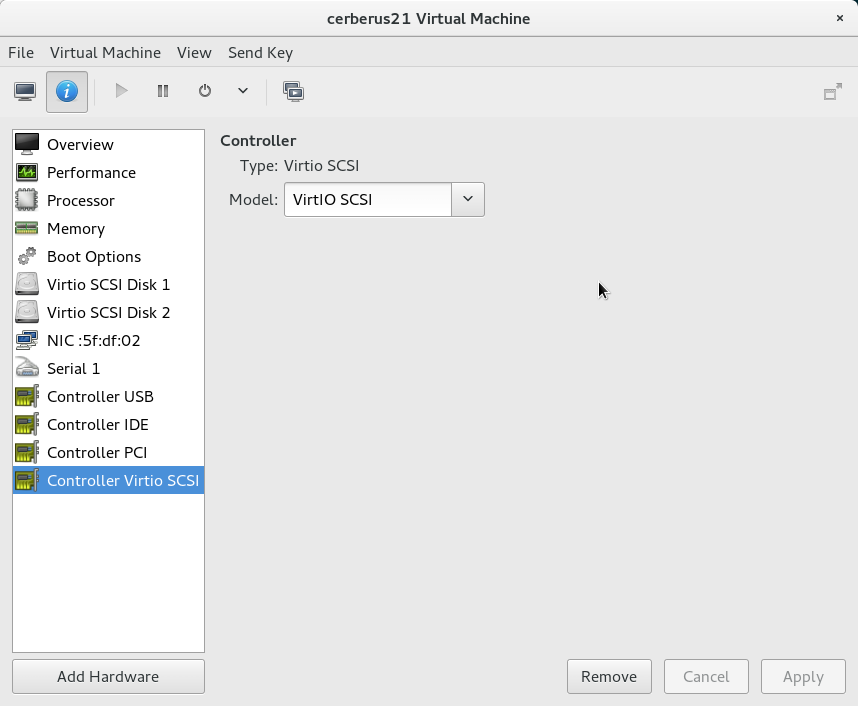
The latter step might not be required. The only other option is “hypervisor default”, so it might just use virtio-scsi by default. Better safe than sorry.
Boot and check your VMs
After starting your VMs, you should be able to confirm that discard support is enabled:
sudo lsblk -o MOUNTPOINT,DISC-MAX,FSTYPE
If you see 0B under DISC-MAX, then something didn’t work:
MOUNTPOINT               DISC-MAX FSTYPE
/                              0B ext4
However, if you see an actual size, then congrats. You support discard:
MOUNTPOINT               DISC-MAX FSTYPE
/                              1G ext4
Configure your VMs themselves to discard unused data
Manually run an fstrim to discard all the currently unused crufty storage you’ve collected on all applicable filesystems:
sudo fstrim -a
Going forward, you can either add ‘discard’ to the mount options in fstab, or use fstrim periodically. I opted for fstrim, as it has a systemd timer unit that can be scheduled:
sudo systemctl enable fstrim.timer
sudo systemctl start fstrim.timer
Done! Or am I…
Now, there are additional considerations to be made during backup.
For example, if you use rsync, you’ll probably want to add –sparse as an option, so it doesn’t inflate your backup copy to full size. However, that won’t actually punch holes that have been discarded since the last backup. So you still need to use fallocate on your backup copies to actually reclaim discarded space.
Another pain is I back up to a btrfs filesystem, which uses snapper to preserve previous revisions. This should be a great solution, however, there are other considerations:
- rsync’s default behaviour is to do all work in a copy, then replace the original. As far as btrfs is concerned, this is an entirely new data, and doesn’t share anything with existing snapshots. That means btrfs snapshots are quite bloated.
- need to use –inplace to avoid above snapshot bloat.
- –inplace and –sparse are mutually-exclusive. Well shit.
My current solution is to use –inplace for backups, then fallocate all files. I try to manually rsync --sparse new VMs ahead of their initial backup to avoid the temporary inflation that –inplace would cause.